Wednesday, June 27, 2012

Harvesting Potatoes!


For the last few weeks, the potato plants have been showing the telltale signs that it's almost time to harvest: turning yellow and dropping leaves. Normally, you would want to wait until the plants are completely dead and let the potatoes remain in the dirt for a week or so in order to thicken and firm up the skins. This helps with long-term storage. However, since we planned on eating them all right away, this wasn't necessary. Plus, we needed the space! The tomatoes have become like a jungle out there!
 
The start of the harvest....
 We began by removing the stakes that held up the plants, and pulled them up by the stems. They pretty much snapped off, but did reveal a couple of nice red potatoes, which encouraged us to dig! We ended up dumping the container of dirt into an empty recycling bin to sort through and find the potatoes. As you can see, we ended up with a nice harvest, given a 7 gallon pot. We got 2 very nice dinners out of them, which was about 2.5 pounds or so total. Not bad for 3 little chunks of seed potato!

The harvest! Not bad for one 7 gallon planter
 The flavor was amazing: creamy with a pronounced potato taste, and just a touch of sweetness. As far as "grading" this crop goes, I would give it an A for container growing. You get a pretty good harvest to space required ratio, the plants grow mostly vertically, with very little horizontal spreading compared to something like the broccoli, and they seem very easy to grow. I definitely recommend mounding them in the pots, as we had potatoes distributed evenly throughout the depth of the soil (although most of the biggest ones were in the bottom 1/3 of the container). We started by planting the seed chunks in about 6 inches of soil, and just kept burying the plant almost all the way to the top of its leaves until it reached the top of the pot. This seemed to encourage root development all along the stem, which of course means potatoes all throughout the pot!

Dinner that night included garden potatoes and even more garden chard!
Finally, you can grow another potato crop right away, since they are fairly quick. The only reason I'm not planting another crop right away is that we just don't have the room with everything else going crazy out there. Next season we will be growing a couple of potato varieties, and probably in even bigger containers so that we get even more of a yield.

In all, I would definitely recommend potatoes to any container gardener. Even if you have a vegetable garden planted in your yard, growing potatoes in containers makes them a lot easier to harvest, since you don't have to deal with compacted soils, roots from trees or other plants, or rocks getting in the way. Plus, you know where the potatoes are: they are confined by the walls of the planter. You can just dump it out and dig for your potatoes without worrying about accidently cutting one in half with a shovel or spade.

Until next time, happy gardening!


Monday, June 25, 2012

Fertilizer and Pesticides in Container Gardening


A couple of posts ago I mentioned posting a bit about fertilizer and what I use for my plants. Let me begin by saying that I am not overly concerned with whether a purist would dub my garden “organic.” In my opinion, growing plants in plastic containers on the roof of a house in the middle of a city using a planting medium that is not dirt isn’t very “organic” to begin with. That said, I do try to limit my use of chemicals and poisons on plants that I plan on eating. I’ve always thought it odd to spray a pesticide that can kill you on a plant that you intend to eat.

In terms of pesticides, I stick to insecticidal soap, which is non-toxic, effective, and fairly cheap. It’s just soap with fatty acids in it that break down the hard shell of most garden pests. It’s harmless to people and animals, but in my experience works just as well as the nasty stuff with all sorts of skulls and crossbones on it.
Safe and effective! This is my choice for pest control
My main vice is using Miracle Grow fertilizer. Yes, I know that in some gardening circles the mere mention of MG causes twenty page debates over the virtues of bone meal, chicken feathers, ground up rotting fish, and all sorts of other stuff. Actually, I did use some pasteurized chicken manure back in early May when everything went out. That said, I really want my plants to have enough nutrients, and when you are growing in a container this is especially important. In the ground, they can draw upon a large volume of dirt for water and nutrition. In a container, plants are limited to a small percentage of the soil volume they would normally occupy. This is where the fertilizer comes in.
It’s important to note that I err on the side of less. The main drawback to using a chemical fertilizer like Miracle Grow is that it can burn your plants if you are not careful or if you over-apply it. I use it once a month early on, then not at all unless it appears needed. In fact, I normally don’t fertilize after July 1 or so at all, as it’s often not needed. 

This is an effective product with a good ratio of nutrients for most veggies (not just tomatoes)
Also, not all fertilizers are the same. You have to pay attention to the ratio of nitrogen to phosphorus to potassium. In talking to other gardeners and from personal experience, I really like the Miracle Grow labeled as “tomato food.” Yes, it is different from the blue Miracle Grow you put on your houseplants. For one thing, it has a different ratio of nutrients than the regular Miracle Grow. Vegetables need more than just nitrogen, which the traditional “all purpose” Miracle grow tends to consist primarily of. This is essential, because while nitrogen is great for lush, green foliage production, it does little for fruit production—and fruit is after all why you are planting your garden! Making sure you are giving your veggies enough phosphorus and potassium will ensure that they will root well and vigorously set fruit.

The tomato MG even looks like pink lemonade! Yes, that is a fish on the pitcher; these are the pitchers I user for my fish tank (but that's a topic for another blog!)
If used in small quantities and applied only as needed, a chemical fertilizer like Miracle Grow will result in vigorous healthy plants. Other things work too, of course. Your plant doesn’t care how the nitrogen, phosphorus and potassium get into its dirt; it just needs to be able to access nutrients as needed. If you enjoy dealing with jars of gooey rotting fish slime and bags of animal manure, knock yourself out! Chances are the smell on your patio will not be very pleasant, which is the major reason I avoid using these products on my upstairs porch. Also, most potting soils come with fertilizer in them anyway, minimizing the need for additional fertilizer. Just be conservative with your fertilizer use and pay attention to your plants.
Until next time, happy gardening!


Friday, June 22, 2012

Broccoli in Containers


Tonight we had another harvest, this time in the form of broccoli! I thought it only fitting to pay homage to this tasty veggie, while also reviewing my experiences with it as a container garden plant. 

A tasty treat!
First, I’ll discuss the plusses. Most importantly, the broccoli was absolutely delicious! Its fist-sized crowns were tender, nutty, and sweet without a hint of bitterness. I chopped them up in chunks, and quickly sautéed them in about a teaspoon of olive oil, some minced garlic, salt, and pepper (my favorite way to sauté most veggies). Don’t forget to eat the stalk, especially on your homegrown broccoli, as it’s just as good as the crown! I just slice it up and toss it right in when cooking, or eat it raw. You can also eat the broccoli leaves, which taste a bit like collard greens, although they are somewhat bitter and unpleasant. I just throw them out.
 
The leaves are pretty, but a little bitter
Another plus was that the broccoli grew well in its slightly cramped planting (cramped according to the numbers you read online, anyway). I planted three broccoli plants in a 6.5 gallon container, and we got a really nice crown of broccoli from each plant. We harvested when we did because in this heat we’ve been having here (a few days of near 90 degrees) some of them were turning a troubling yellow color, meaning they were getting ready to flower—likely as soon as we went out of town for the weekend. I figured that I would rather taste them than try to squeeze another few days of growth out of them only to have them bloom. They were easy to grow, very tough plants, and the bluish leaves are pretty.

A full container, but 3 plants in a 6.5 gallon pot worked fine!
The only real negative I can share is that the harvest to space ratio is fairly poor for broccoli. The plants get pretty big, and once you harvest the crown you do get some side florets, but for most people the main harvest is going to be the bulk of what you get in terms of yield. In my case, I really needed room on the porch, so I just took the plants off the porch after harvesting the crowns. After weighing the benefit of a few side shoots against the large amount of horizontal space needed for the plants (not to mention the jungle that is growing out there) I decided that the main harvest would have to do this time around.
 
Would I recommend broccoli for container gardens? Well, it depends. If your space is somewhat limited, you have to consider that it will need a large container (at least 6 gallons in my opinion) and you will get a couple of nice broccoli crowns for the space you invest. Weight that against dozens of large tomatoes, squash, or peppers, or even hundreds of cherry tomatoes, and you’ll see what I mean by the harvest to space ratio. Also, the broccoli harvest is mostly a one-time harvest, whereas a tomato or pepper plant will give you continual harvests over a longer period of time. If you are like me and have a ton of different containers going, it’s a fun and tasty crop to grow. If you can only put out a few containers, you might be better served planting something that will continue to produce for you over a longer period of time, unless you really love broccoli. I think that when I am planning next year’s garden I might skip the broccoli, simply because the amount of it I would need to plant to realize a nice harvest would take up half the porch! 

Dinner time!
All in all, I would rate this plant a B- when it comes to container planting. It has an amazing flavor, it is easy to grow, it is pretty to look at, and it is fairly quick to produce. On the down side, it provides one main harvest and does take up a large amount of space for what you get in return.

I had toyed with the idea of planting more chard or some collards in the now vacant broccoli container, but I really need the space, as the tomatoes are now all over 4 feet tall and have become a jungle in the past 2 weeks. Ditto for the cucumber! I might transplant the patty pan squash I started a week ago from its 5 gallon pot into the square planter, but only if I can rearrange things to better take advantage of the little bit of space we have left.

Until next time, happy gardening!


Thursday, June 14, 2012

First Swiss Chard Harvest!

Last night we had our first meal using a vegetable from the garden. It wasn't just any veggie either; it was one of all-time favorite vegetables: rainbow Swiss chard!

View of the stems, my favorite part of the chard!
Although I normally like to saute greens like collards, kale, or spinach, my favorite way to enjoy chard remains a simple steam just until it's tender but still has a slight bite in the stems, sort of like an al dente pasta. Then I put just a touch of butter and a little fresh ground pepper on it, and that's it! I like my greens to still have some life and color left to them, especially when they are so colorful!

Don't throw the stems away! Unlike some cooking greens, the stems of chard are delicious and tender!
The great thing about harvesting chard is that if you take only the large outer leaves it will continue to produce for you all summer long. I tried using kitchen shears to harvest these leaves, but I think a small knife works better because you can cut the leaf right down near the bottom so that no stem is wasted. As you can see from the last picture below, this dinner portion barely put a dent in the chard container. Based on my experience with it so far, I would say that the 6.5 gallon square planter that I'm using with about 6 chard plants in it will grow extremely well and provide two people who LOVE cooking greens with plenty of chard for a couple of dinners per week.

The chard box AFTER we harvested our dinner... still plenty left!
In terms of other goings on in the garden, I planted some collard greens in the Romanesco pot (it had been decimated by the hungry hungry caterpillar) so I'm hoping that we'll have a nice fall crop of collards to follow up the chard. I've never grown them, but according to everything I've read and heard collards take about 90 days from seeding to harvest, so that would make this planting a mid-September crop. The great thing about collards is that they actually improve in terms of taste (they get sweeter and more tender) with frost, so I'm hoping that by the time they are really ready to harvest we can get a solid 6 weeks or so out of them, as they not only enjoy the cool weather but will also continually produce like chard does. I know some people who harvest collards into November even here in Western NY! Chard will usually truck along until late summer, but eventually the fun ends and it will go to seed or get taken out by the frost.

If you are like me and want cool new stuff to look forward to from the garden even in the fall, try collards and kale (which I am planting as soon as the broccoli is done). Kale is delicious sauteed with a little olive oil, minced garlic, salt and pepper (just remove the stems!), is tough as nails, and has the added benefit of being just about the healthiest thing you can eat.

Until next time, happy gardening!


Tuesday, June 12, 2012

Some Close-Up Photos

This post will be mostly a photo update from the garden. I decided to play around with the camera and take a few close-up and "in the container" photos in the garden this morning. Here are a few of my favorites so far.

The broccoli is starting to form nice heads that hopefully will be ready sooner than later! More to come on fertilizer in my next post!

Until then, happy gardening!


Broccoli

Mystery Heirloom Tomato
Cucumbers... View from the dirt level inside the container
Beets

Sweet Banana Pepper

Saturday, June 9, 2012

Zucchini in Containers: Some Thoughts for a Rainy Day

 It’s been a cool, rainy end to the week here, but warm temperatures and a lot of sun are just around the corner! It’s been about a week since the last update, and there is a lot to report from the garden.

View of garden on 6/9/2012

View of garden from other direction
As you can see from the photo taken this morning, the plants are literally taking over the porch! Plants that a couple of weeks ago were small and nicely confined to their pots are now gargantuan jungle plants gobbling up every bit of free space they can find. It’s truly amazing how fast they grow once they get a little bit of sun and some warmth.

Luckily, the potatoes are almost done for the season, as their flowers are just about to pop. I’m hoping that they’ll flower by Monday or Tuesday, and then we’ll be able to harvest them sometime in a week and a half or so. Since we’re not expecting a huge yield from a 7 gallon pot, I’m not worried about leaving them in the dirt to harden up before we harvest. Unless the plants surprise us and produce a huge harvest, the potatoes we get probably won’t last any longer than it takes to clean them up and cook them!


The potatoes are almost ready for harvest!
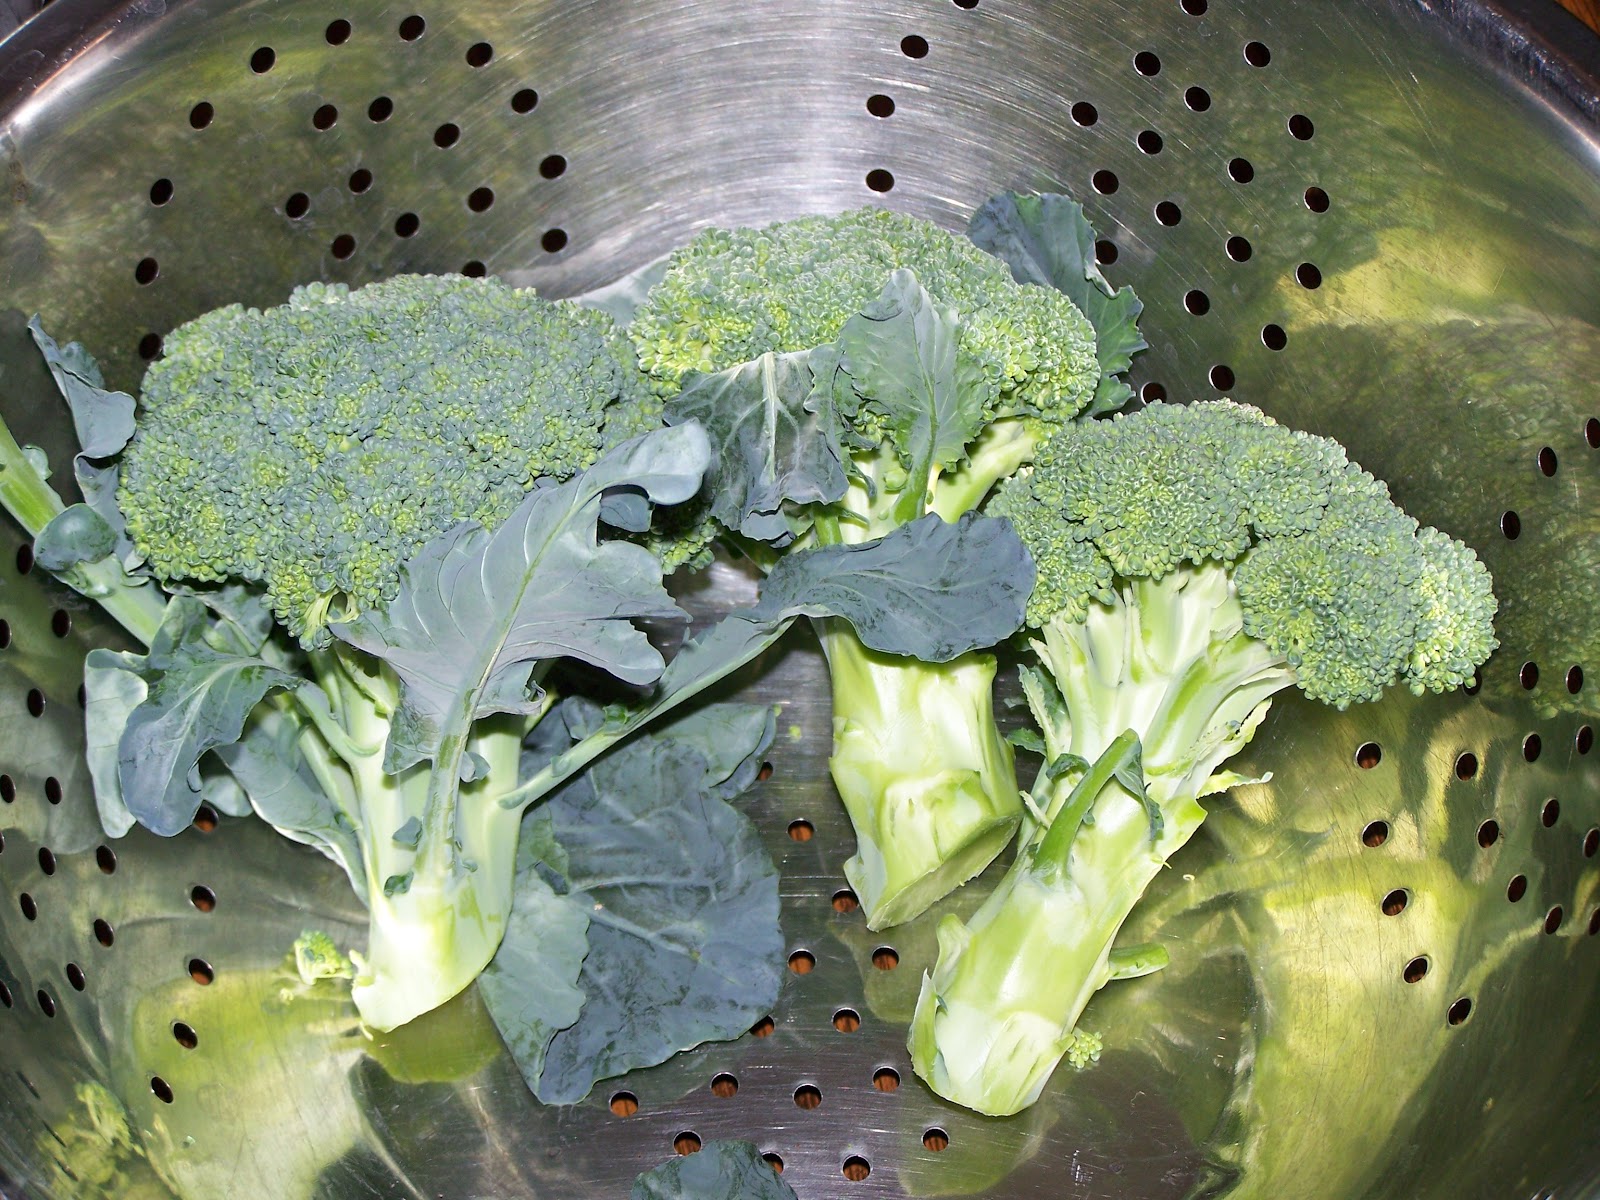
The same goes for the broccoli, which is starting to form heads deep down in the stalk. In a couple of weeks we will likely be harvesting broccoli, and then it will be mostly done and that will free up some space. To save more space, I moved the nasturtium inside to the back room because the wind on our porch was pretty much shredding it, but if you have a spot where you can hang a nice basket, nasturtiums would make a great hanging plant. Given the almost weekly 30+ MPH winds we get up here, any sort of hanging basket would be a waste on our porch.


Broccoli, Romanesco, Cucumbers, Beets, and Swiss Chard
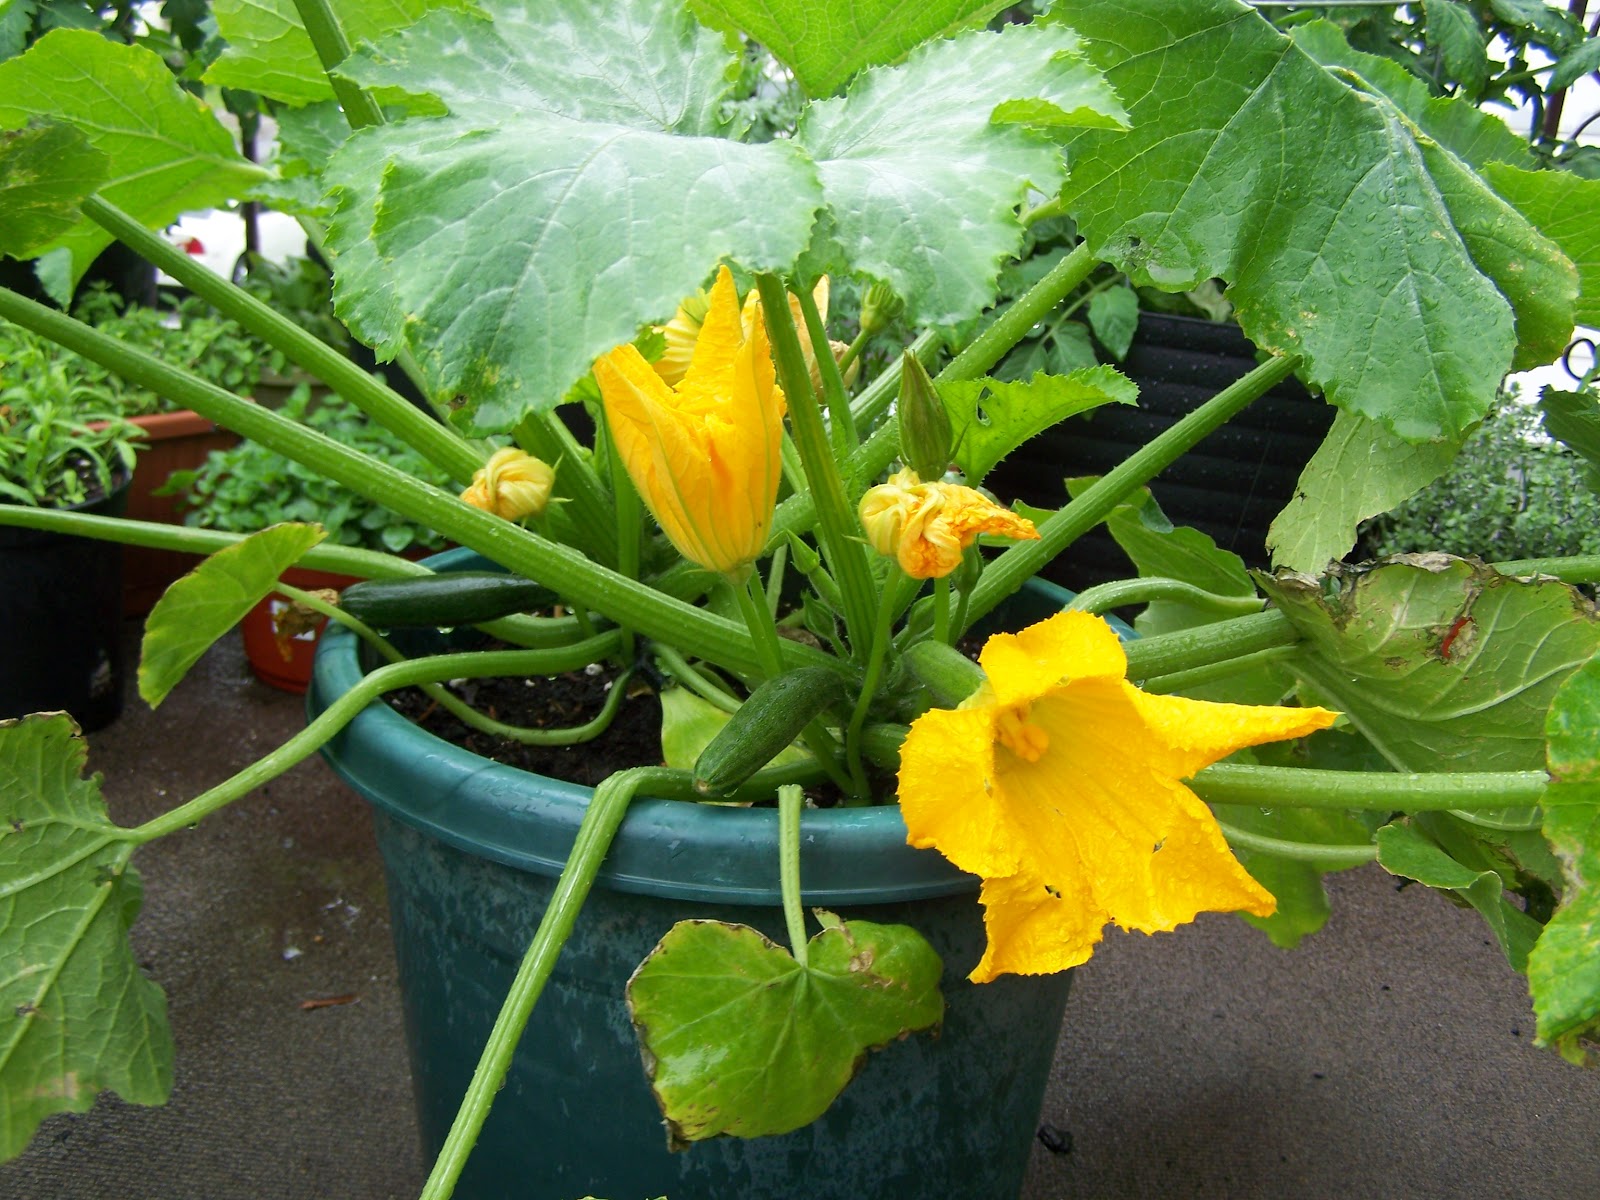
Now a word or two about zucchini squash. First of all, this plant is amazing! It already has at least 10 baby squash in various stages of development. On the other hand, if you plan on growing this plant expect it to need a LOT of horizontal space! It is HUGE (and the one we have is still small comparatively).  Most plants grow vertically, so it needs a different type of space than peppers, eggplants, tomatoes, etc. Ours is now sitting in the middle of the porch (which I am not fond of but there is nowhere else for it to go!) guarding the tomato plants. In about a week or so, we should have several nicely sized squash.


Zucchini plant

Squash will be ready for harvest soon!
This brings me to my next point about these plants. One container with 2 zucchini is probably plenty. They produce heavily, so unless you eat enormous quantities of squash you’re probably going to be fine with 2 plants. I ended up taking the other 5 gallon pot of squash off the porch, as it was just too small a container to keep the plants from wilting, and we did not have the space for two containers of squash. Even the roughly 6 gallon pot that I have two plants in as about as small as you would want to go, because it needs watering about every other day. This is the pitfall of squeezing things into smaller pots: the plants suck the moisture out of the smaller volume of soil much more quickly, creating the need to water on an almost daily basis. Then again, as long as you keep the plant watered and fertilized it will be okay. Personally, I like a more low maintenance setup, so next season I will plant the squash 2 plants to an 11 gallon tub (the kind the tomatoes are in now).

Speaking of the tomatoes, they are growing very quickly, and almost all of them have numerous flowers now. It looks like 2 plants to an 11.4 gallon tub is the perfect ratio of space saving container usage to healthy plant growth. I did put 4 cherry tomato plants in one 11.4 gallon tub, and those look like one gigantic bush of tomato, but I think in the future I would limit it to 3 cherry or 2 full-size tomato plants per tub. I am also starting to think that we will be doing some canning, because we are going to have an enormous harvest of tomatoes (hopefully!). 

Black Krim

Green Zebra

Yellow Pear and Sungold (more Black Krim to the Right)
Since it has been raining all day here and it is supposed to be pushing 90 in a couple of days, I expect even more of a growth spurt from the plants. This is a great time to fertilize container plants, since they will have nutrients, water, heat, and sunshine in abundance in very short order. Look for a post on that tomorrow!

Until then, happy gardening!

Sunday, June 3, 2012

An Early Harvest Update

I thought I would provide a quick update on our harvests so far!

The Ozark beauty strawberries have been producing 2-3 berries a day for about a week now. We have picked about 15 berries so far. A few have been about the length of a paper clip, while most have been the size of a wild strawberry that you might see in the woods. They have been tasty though! I think that the plants are still a little small, as they are still developing and growing leaves, so I anticipate even more when the late summer crop comes.

The Ozark Beauty plants.... I did end up weeding their box

The other thing we have harvested (aside from almost all of the herbs to one degree or another) is the mesclun mix. It is starting to get a little bitter, so it's almost time for it to cede its container to the collard greens, which I plant to start from seed in a month or so for a nice fall crop.

Mesclun greens.... fresh greens are so much better than anything store bought!

On the vegetable front, the zucchini has a few squash that are about 3 inches long, and many flowers appear about to bloom! All it needs is some warm weather after all this rain the last couple of days, and we will probably have some squash to eat in about a week or so. Also, the Swiss chard is looking like it will be ready to provide a first cutting in about a week or so. Remember with chard to just cut the biggest leaves and leave the "heart" the plant alone and it will continue to produce new leaves for you all summer! It's one of my all-time favorites!

Chard is almost ready!


Until next time, happy gardening!


Saturday, June 2, 2012

Drilling Holes for Better Drainage


One thing that I noticed recently was that the square planters I bought at Home Depot did not have sufficient drainage. The only drain hole they had was one very small hole in the very bottom, and you have to remember to remove the little rubber plug before planting. I did drill a few extra holes in the bottom, but the biggest drill bit I had was still fairly small for a drainage hole. I’m pretty sure that’s why the okra looked so unhappy for its first couple of weeks outside (okra likes well-drained soil). 

In general, I like to keep my soil slightly dry (but not dry enough to wilt the plants of course!) rather than slightly soggy. This allows air flow around the roots, which is crucial, as well as nutrients to remain in the soil. If you over-water you’ll notice your plants’ leaves turning yellow. This is usually due to nutrients leaching out of the soil along with the water (a problem you don’t have as often when planting in the ground).

Now that's a drill bit!
 
I order to improve drainage, I decided to get a bigger drill bit and drill some additional holes into the bottom sides of the planters. The biggest bit my drill could handle was a 3/8'' bit, which was about $5 at the local big box store. As you can see, I drilled 4 holes on each side of the square planter, making 16 holes per pot. I also re-drilled the large black bins, which had pinched the smaller drill holes mostly closed. Now I don’t have to worry so much about drowning the plants’ roots when it rains.
 
New drill holes(these are easily hidden by putting smaller containers in front of them). And yes, I did clean up the plastic shards after I was done! 

Speaking of soil moisture, I must commend the Sta Green mix for its ability to hold a good deal of moisture. Last week it was in the high 80’s and very sunny and breezy for quite a few days, yet the garden went about 3 days without being watered and the dirt was still a little moist (a 4 or 5 out of 10 on my moisture tester) in most of the larger containers. The smaller ones (especially the marigolds) were dry though, so I just gave everything some water. Mother Nature chipped in with a long soggy rainfall on Friday, so I probably won’t need to water again until the middle of next week or so.

This is an advantage of the larger containers over smaller ones. Less maintenance is needed to keep the plants healthy, since the system has a built in buffer due to the volume of soil being used.

Until next time, happy gardening!

Friday, June 1, 2012

Okra, Squash, and More!


Well, it has been another week since I’ve updated the blog, and as you can imagine a lot is going on out there! I will try to make sure to provide more frequent updates, especially since it looks like there will soon be some produce to write about!
 
View of the garden

As you can see from the photo above, the plants have been loving this heat and sunshine! Just take a look at those monster squash plants! I counted a good 40 zucchinis starting between the 4 plants we have in these 2 pots, so I anticipate giving a few away! I had worried that 2 plants per container was going to be too crowded, but they do not seem to mind. One tip for any potential squash growers: these plants get HUGE! Plan to have a nice big space for them to spread out horizontally.
 
Zucchini
 The okra seems to have rebounded nicely as well. One thing I recommend for anyone who is interested in growing okra is a good insecticidal soap. Last summer the okra was set upon by an army of tiny ants that took to sucking its sap and nearly killing all of the plants. After reading up on it, apparently okra plants have a very sweet flesh, which of course ants love! I tried all sorts of “home remedy” type solutions, ranging from spraying the plants with cayenne pepper water to sprinkling them with cinnamon. Actually, the cinnamon helped a little, but not enough.

Red Okra

Green Okra
 What finally worked was the insecticidal soap. It has a lot of benefits over traditional pesticides, not the least of which is that it is non-toxic. It’s pretty much soap with potassium salts in it. The potassium salts actually eat away the exoskeletons of most garden pests, killing them in short order. I’ve always thought that if a given pesticide is poison to humans, why would I want to spray it onto something that I plan to eat? This product gets around all of that, as it is not only organic, but also pretty much harmless to people and animals.

After I applied the insecticidal soap, the ants were pretty much gone for the summer. This year, we had caterpillars that enjoyed munching on the broccoli, Romanesco, and eggplant leaves. The dreaded ants also seem to have returned to the okra. So far the soap is working very well to control both pests. The one thing with the soap is that you do need to re-apply it fairly often, as rain (and watering with a hose) washes it away fairly quickly.

Here are a bunch of pictures from the garden taken last night. We also added some petunias and celosia for color. The petunias and marigolds are blooming nicely, and it looks like the zinnias will be ready to bloom soon.

Until next time, happy gardening!

Peppers! Left: California Wonder, Right: Carnival Mix, Front: Sweet Banana

Nasturtium

Marigolds

Eggplants, Swiss chard, cucumbers, and herbs (cilantro and parsley in one, chives in other)