Wednesday, May 23, 2012

Reorganizing the Garden

The last week or so has been busy (thus the lack of posts). The good news is that the 2012 garden season is off to a great start! So far we’ve harvested dill (for homemade hummus), cilantro (a few times), thyme, parsley marjoram, mint, and catnip. As an avid foodie, the herbs are one of my all-time favorite parts of the garden. Nothing beats being able to walk outside and snip fresh herbs of any type you need whenever you need them! I planted every herb I could possibly think of, and this year I plan to dry as much as possible for the winter.

Who can resist fresh marjoram?
 
The herbs aren’t all we’ve harvested, though. Just yesterday we harvested our first batch of mesclun mix, and our first two strawberries! The Ozark Beauty is a really intense berry, and is a bit smaller than you would find in the grocery store (as most everbearing varieties are). So far it is has been a productive, attractive, and active plant, with tons of small berries in various stages of ripeness now. The plants aren’t even fully developed yet, as we planted most of them as bare root bundles, so they are still putting out leaves at a fairly quick pace. I’m hoping they get even bushier and fill out their boxes by fall.

Ripe Ozark Beauty!

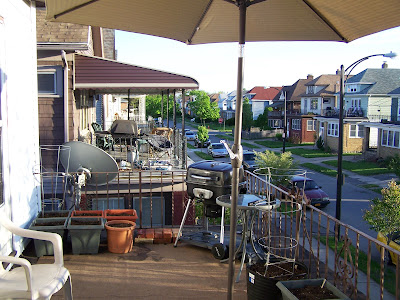
 This weekend was a hot and humid one here, so we spent some time going through the annual ritual of excavating the air conditioners from their resting place in the closet. It had dawned on me as I was unearthing the monster that would reside in our living room window that I hadn’t planned for that when I set up the porch garden. Suddenly, a reorganization of the garden was necessary. After what seemed like days of moving things around time and time again, I think we have a good setup. It looks neat, the weight is spread around evenly and is mostly against the house or along the edge on top of the downstairs walls (important for our upstairs porch), and it is easy to get to each plant.

The new and improved setup
Everything is coming along really well, except for the okra. It looks better than it did, which is encouraging, but it is still a pale yellowish color. I think we may have planted it a bit too early and the soil wasn’t quite warm enough for the roots. Okra likes the heat, so it did rally a bit this weekend. The nights being in the mid 50’s to low 60’s (rather than the 40’s) has also helped. We’ll see how it goes. Okra is one of the coolest plants to grow, and generally has done really well for us in containers. It also tends to start off slow, so I’m hoping it gets established and flourishes soon.

A little further down the porch, the tomatoes are looking fantastic! It’s amazing how quickly tomatoes grow, and also how quickly the stems turn into something almost tree-like. This is especially good on our porch, where there is seemingly always a stiff breeze. The same goes for the peppers (one of my personal favorite things to grow!).

The stars of the garden so far have been the broccoli, Romanesco, and the potatoes. All have gone berserk with the sunshine and warm weather. I had worried about the broccoli being a bit crowded, but so far it is doing extremely well and does not seem stunted at all. We’ll see about the harvest, but so far so good!

Broccoli enjoying the sunshine
 The one crop that isn’t too happy out there in all this sun and warmth is the lettuce. The porch is way too sunny and hot for it, so I moved it inside to the room we had used for seedlings to see if it would do better there.

It’s always exciting to see things really start to grow after putting in so much time seeding, potting up, planting, etc. I’m especially excited to see what types of tomatoes we ended up with in the heirloom mix packet. We know we have one Brandywine (see the photo below) but other than that it’s anyone’s guess!

One of heirloom mix tomatoes isn't quite so mysterious!

 Until next time, happy gardening!


Thursday, May 17, 2012

Plants Wilting in the Cold


Last night was a cold one here. It got down to about 43 degrees or so. This morning, I went outside to check on the plants. The tomatoes looked good. The herbs and flowers all looked fine. Of course the broccoli and lettuce is happy (they like the cool). The okra is not very happy (but the okra will get its own post, where I hopefully talk of how wonderfully it has recovered).

With all that said, to my shock and sadness, I found half of the eggplants and half of my banana peppers wilted and looking pathetic from (something). The dirt was wet, so it wasn’t that. It’s been windy like crazy here lately, so although it could be that I wasn’t sure, since they hadn’t wilted before. It also got cold last night for the first time since they has been out, which corresponded to them wilting. This led me to believe that they got too cold and were probably goners.

Sad pepper plant

Sad eggplant
another sad eggplant


As you can see in the picture above, they were not happy. I moved the long planter of banana peppers over to the sun to get a better look, became sad to see them like that, and went inside to check on the grow room peppers. I was making plans to swap out a couple of plants, and about 20 minutes went by. When I went back outside with my camera to document the damage, all but one of the peppers was upright and normal! Since this happened after they were moved into the sun, I figured it must be an issue of getting too cold. I put a container upside down over the lone sad pepper, and both sad eggplants.


I decided to try covering them for a bit
 An hour later, as if by magic, they all look good as new!

Happy pepper!
Happy eggplant

Another happy eggplant!
The lesson I learned from this is that this type of wilting can be caused by the cold (and maybe the wind as well). If this happens to you, don’t despair, and don’t tear up your plants without giving them the chance to bounce right back. The pictures above represent the difference that an hour in the direct sun made.

With gardening, every day is an adventure!


Wednesday, May 16, 2012

Starting mint from seed


It is windy and cool today, but this weekend will bring 80+ degree days, sun, and 60+ degree nights, which is why I’m glad to have everything settled in. Most of the plants are doing pretty well, despite the almost non-stop wind we’ve had lately (which is the thing I worry about most). Plants are a lot tougher than we realize, though.


One thing that is important to me is that we started nearly every plant in the garden from seed, with the exception of the mint (more on that below), lemon balm, the strawberries, one pot of forget me nots (the ones not flowering yet are from seed) and one pot of catnip (the other was also from seed).


Ozark Beauty Strawberry


 I have come to the conclusion that buying mint seeds is a total waste of time. I started two entire packets and got one little seedling (although it is starting to do okay). I never got a single lemon balm seedling from an entire pack. This corresponds to my experiences last year as well.

I tried everything I could think of: planting extra shallow, not even covering the seeds at all, starting them inside, starting them outside… Even rosemary was a breeze for me this year from seed. But no dice on the mint seeds, which is okay. Mint is probably one of the easiest plants to obtain and grow.

Basically, mints like to propagate via shallow horizontal root structures, and even though they produce seed, germination rates are abysmal. If you’re into aquarium plants (another of my hobbies) you might notice that mint spreads a lot like java ferns. It shoots out a shallow runner and sprouts up all along it.

This year I will try to overwinter the mint and lemon balm plants in the attic. One thing is for sure: if you want mint, it is best to just get a few plants rather than bother with seeds.It all tastes the same in a nice cold glass of iced tea on a hot summer day!

Marigolds almost ready to bloom!


Tuesday, May 15, 2012

The Garden is Planted!


Well, the entire garden is officially planted! Here is the entire list of crops we have growing, and how they are planted. The potting mix I used is Sta Green Moisture Control (1/5 or so) and the other 4/5 or so is regular Sta Green Potting Mix.


View of garden from porch door

View of garden toward porch door


Fruits and Vegetables

Tomatoes

            Black Krim (4 plants total)
                       
                        2 plants in one 11.4 gallon tub
                        2 plants in one 7.5 gallon pot

            Green Zebra (2 plants total)

                        2 plants in one 11.4 gallon tub

            Burpee Heirloom Mix… I’m calling them mystery tomatoes (5 plants total)  

                        1 mystery and 1 Brandywine in 11.4 gallon tub
                        1 mystery in 5 gallon nursery pot
                        2 mystery in 7 gallon nursery pot
           
            Sweet 100 (2 plants total)
           
                        2 plants in 7 gallon nursery pot

            Sungold (1 plant total)

                        1 plant in 11.4 gallon tub with 3 Yellow Pear plants

            Yellow Pear (3 plants total)
           
                        3 plants in 11.4 gallon tub with 1 Sungold

            Jellybean (2 plants total)

                        2 plants in 5 gallon pot

            Tomatillos (2 plants total)

                        2 plants in 5 gallon pot


The Tomato Section
 
Peppers

            Sweet Banana (6 plants total)

                        6 plants in a 7 gallon long window box planter

            California Wonder (5 plants total)

                        4 plants in 6.5 gallon square planter
                        1 plant in 4 gallon long planter (w/ 2 Carnival)

            Burpee Carnival Mix (6 plants total)

                        4 plants in 6.5 gallon square planter
                        2 plants in 4 gallon long planter  (w/ 1 California Wonder)

Okra (8 plants total)

            4 Red Okra plants in a 6.5 gallon square planter
            4 Green Okra plants in a 6.5 gallon square planter


Burpee Mix Eggplant (6 plants total)

            2 plants in one 6.5 gallon square planter
            2 plants in another 6.5 gallon square planter
            2 plants in a 3rd 6.5 gallon square planter

Peppers and Eggplant
 
Cucumbers (8 plants total)

            5 Straight Eight Cucumber and 3 Lemon Cucumber (all in one 11.4 gallon tub)

Broccoli (3 plants total)

            3 plants in one 6.5 gallon square planter
            *** a 2nd crop will be planted in late July for fall harvest ***

Romanesco (3 plants total)

            3 plants in one 6.5 gallon square planter
            *** a 2nd crop will be planted in late July for fall harvest ***

Bright Lights Chard (7 plants total)

            7 plants in one 6.5 gallon square planter
             
Bush Zucchini (4 plants total)

            2 plants in one 5 gallon nursery pot
            2 plants in one 5.5 gallon pot

Beets (Detroit Dark Red)

            One 7 gallon window box planter (2 rows, plants spaced 3 inches apart)  
            *** plants will be continuously seeded as harvested until fall ***

Red Norland Potatoes (one 7 gallon nursery pot)

            3 seed chunks in one 7 gallon nursery pot

Lettuce (2 window boxes total)

            One 7 gallon long window box planter with Mesclun Mix (½ spicy, ½ sweet)
            One 4 gallon window box planter with Bibb Lettuce
            ** Romaine will be planted in Bibb planter after Bibb crop is harvested **
            ** Mesclun will be continuously seeded until fall **

Ozark Beauty Strawberries (3 window boxes)

            1 36 inch window box (7 gallons)
            2 24 inch window boxes (4 gallons)

Herbs

Dill
Thyme and Lemon Thyme
Rosemary
Purple Basil, Sweet Basil, and Genovese Basil
Chives and Garlic Chives
Spearmint
Lemon Balm
Catnip
Marjoram
Chamomile
Tarragon
Cilantro
Parsley
Sage
Oregano
           
Flowers

Nasturtiums
Marigolds
Forget Me Nots
Zinnias
Petunias

Cucumbers w/ square trellis
Red Norland Potatoes (these grow about an inch a day, if not more!)
  As you can see, that is quite the list! One of my goals in putting together this garden was that we get a high yield out of a small amount of space. Another was that it not look crowded or messy. Finally, we needed to have plenty of room left on the porch to sit outside and enjoy it!


Every porch garden needs a nice sitting area...and a bluejay rain gauge!
I think we were able to accomplish the goals of getting a wide variety into a small amount of space, and so far it looks pretty good. The yields will be interesting to see. I did plant the squash and broccoli a little tight, but the plants look amazing so far. Experience tells me that the tomatoes, okra, peppers, and cucumbers have more than adequate space to produce fairly well. I’ve never grown eggplants, strawberries, or lettuce in containers before, so this is a learning experience!

This table not only helped consolidate the smaller pots, it also doubles as a hose holder!
 As time goes on, look for data on the “Harvest Data/Yields” page. I will keep a running tally of the harvest from each of the major crops (herbs will not be tallied; they pretty much grow and you use them or they don’t grow!) My hope is that if someone is interested in growing Okra (for example) and wants to know how much Okra to expect in a given situation, that person can get the data in a user-friendly format.

Bright Lights Chard

Broccoli
 
Now we water, tend to the plants, and watch for any that didn’t survive the transplant. There are still several healthy tomato, eggplant, and pepper plants in the seedling room waiting for their chance to shine if one of their colleagues can’t hack it outdoors!


Monday, May 14, 2012

Protecting Seedlings From the Wind


As luck would have it, Thursday, Friday, and Saturday were nice and sunny, but also very windy. This posed some problems when trying to harden off the plants. Going from relatively gentle breezes to 20 mph winds isn’t exactly ideal for tender young stalks.

A simple windbreak wasn’t practical, given the swirling nature of the winds on the porch.
Finally, I came up with a solution to get the plants outside that would protect them from the wind. I used some old boxes and put the plants inside, which shielded them from the wind while also allowing them to get all the sunshine they needed.

Boxes make for a great way to protect plants from wind while hardening off
That night, I simply closed the boxes ¾ of the way until morning. When morning came, I opened the boxes back up to expose the plants to the sun again.

So far so good! Now it’s time to get everything planted and set up!

Thursday, May 10, 2012

Hardening Off the Seedlings


A key question for any gardener—particularly on a nice sunny day—is when to plant things outside. Here in Western NY, our average high temperatures have been in the upper 60’s to low 70’s, with nighttime lows between 48 and 55. As I am typing this, it is 2:30 am (I have always been a night owl) and it is 49 degrees here.

I’ve had herbs, marigolds, zinnia, nasturtiums, forget me nots, broccoli, Romanesco, chard, lettuce, beets, potatoes, and strawberries outside for a few weeks now. Most things are doing really well, so naturally I’ve been toying with the idea of getting everything else out there as well.
This Green Zebra is likely saying "Who do you think you're calling a seedling?"
 It’s important to prepare your plants a bit before thrusting them out into the harsh winds and intense sunshine. This process of gradually introducing the plants to outdoor conditions is called “hardening off.” There are any number of ways to do it, but all take into account three main concerns:

1) Temperature: Most people start seedlings in a very warm place (often 70 degrees or more all the time), so suddenly putting the plants into 50 degree temperatures could shock them. This is why you need to gradually expose them to cooler temperatures, which can be done by leaving windows open (if feasible) or putting them outside for a little while each day to get used to cooler temperatures.

2) Light: It sounds strange at first, but although plants need sunlight, those begun indoors under grow lights are not accustomed to the harsh brightness of direct sunshine. Even the dual T5HO aquarium grow lamps (which are several times brighter than a dual florescent strip lamp) that I use are nowhere near the brightness of a cloudy day, let alone a direct blast of sunshine.

You have to expose plants’ tender young leaves to direct sun gradually, so as not to scorch them, which “bleaches” them and turns your healthy young green plant into something sickly and ET looking. Luckily, shade and a little TLC can usually fix this, but why put your plants through that?

3) Wind and rain: Wind is a big concern, especially for me since it seems like the weather here has been almost constantly windy lately. Remember that your seedlings that have enjoyed the relative calm and warmth of the indoors have not grown up with 15+ MPH winds and pouring rain thrashing them around all day long. If you can, use a fan to provide breeze indoors and begin to toughen up the stems, or leave windows open on windy days to give them some wind exposure. You would be surprised how quickly a fan and/or breeze from the window will toughen up the plants’ stems.

Remember how you tenderly watered your plants with a gentle stream from  watering can or handheld pitcher? Well, Mother Nature will water them by sometimes battering them with heavy rain. This is another reason to toughen them up with a fan before they go outside.
 
I have been hardening off the plants in the seedling room by taking a number of steps. The room is a sunroom without any heat vents, so in the winter when these plants were germinated it was rarely above 62 or 63 degrees during the day, and often around 55 or so at night. As a result, they have grown up relatively cold hardy. This is a huge advantage now, as they are less susceptible to shock from cool nights once they go outside. Lately, I have also been leaving the windows open in there, even on nights where the temperatures got down to the upper 40’s. As far as wind goes, it has been quite windy here lately, so the wind coming in the windows has done a decent job of toughening up the plants a bit. I have supplemented that by using a box fan on a couple of occasions. Last night it got down to 54 degrees in the seedling room, so leaving the windows open has been a great way to begin toughening the plants up to the cool nights. Of course, this is not as feasible if your seedlings are in your living room or dining room.


This room has been amazing for raising seedlings (there is also a window to the left across from the one on the right)
 I like to plant on a cloudy day. That way, the plants get a day to adjust to their new containers outside without being assailed by the intense sunlight right away. The next day I keep them in part shade. The biggest issue with putting crops outside in zone 6A now is the remote possibility of frost, so if you decide to plant in the very near future, be aware that you might have to protect plants if temperatures drop below 40. In terms of potential harm to the plants, nighttime temperatures in the 40’s (especially the high 40’s) won’t hurt your tomatoes, eggplants, peppers, or okra, as long as the daytime temperatures are in the 60’s or above. At worst they just won’t grow much. They will be readying themselves for a nice growth spurt the minute conditions become optimal, though!

Here is my current schedule for hardening off and planting the peppers, eggplants, tomatoes, and okra. Really this is a little conservative given the work I’ve already done to acclimate them to the wind/cool nights, but I would always rather be on the safe side.

Thursday 5/10: 3 hours outside in part sun, protected from direct wind
Friday 5/11: 5 hours outside in part sun, protected from direct wind
Saturday 5/12: put outside in early afternoon (plants spend 1st night outside)
Sunday 5/13: move to mostly sunny spots on porch (plants remain outside overnight again)
Monday 5/14: Plant! If it seems like an individual plant needs more TLC, then I will move the entire container to a shady spot. That’s the biggest advantage of container gardening! Really, you could get away without doing any pre-hardening if you are prepared to move the containers around as needed. I prefer not to have to do that, but if you’re in a hurry to plant just make sure your plants are cold hardy and go for it! Monday’s forecast is 67 degrees and mostly cloudy, which I find perfect for planting.

Of course, there are as many theories about hardening off as there are people who do it. If your plants have only experienced 70-75 degrees inside and have never felt a breeze then you will want to do a little more to toughen them up before sending them off into the outdoor world. If you’re unsure, keep some plants in reserve in case some of the first plantings don’t make it.

And remember: part of the fun of gardening is experimenting with different techniques and seeing what works for you. Tomatoes, peppers, eggplants, etc. are pretty tough, and can survive some pretty harsh conditions. I know people who planted container tomatoes outside in mid-April here. It just takes a lot more protection and maintenance than the normal gardener would be prepared or willing to provide. If you rush things too much, your plants will usually survive, but they will often just sit there and look sad until the weather improves to optimal conditions for them.

If you take a few simple precautions, and provide a little extra care at the beginning, you’ll have an amazing garden before you know it!

Sunday, May 6, 2012

Setting up the Planters!


Well, it has been a long, busy week (thus the lack of posts lately!) That said, we did take advantage of this gorgeous weekend to get a lot of work done on the garden!

Over the course of the week an awful thought slowly dawned on me: there were entirely too many containers on the porch! No matter how I tried to arrange them it looked cluttered. Part of my idea in getting all of these containers to replace the empty Tidy Cats bins was that it would look nicer, an advantage that would be nullified if by mid-July we had a tangled mass of green out there!

Finally I arrived at a two-prong solution. First, only the nicest planters would remain. I would arrange them to look good, and then everything we planted would have to fit in what was out there.

Second, I needed an elevated surface that would allow me to “double dip” some of the floor space. Many of the herbs and flowers are in small pots, which were previously scattered all around the porch in-between larger planters. What I really wanted was all the herbs in one place, both for convenience and for looks. With this in mind, on the way home from work Friday I stopped at Home Depot and picked up a few loose boards and some wood screws. My original plan was an 8ft long table that was 30 inches high. The height was chosen in order to allow a large number of plants to be placed underneath and still get plenty of full sun.

Halfway through I realized that the table looked much bigger than I imagined, so I sawed it roughly in half and it became a nice 4ft table! Since all I had was a hacksaw (one of those bright orange metal ones with big teeth), a level, a cordless drill, a tape measure, and some screws, I wasn’t worried about perfection. It just had to work. In the end, I was pretty happy with it; it holds quite a few plants, and it allows for a nice assortment of plants underneath to get plenty of full sun. Not bad for about $12 in materials!

The table for herbs and strawberries...the pinwheels are to keep the birds away from the berries
  After that, we filled all of the planters with soil. It took quite a few bags, but they are all pretty much full! Since we are using an upstairs porch, we did consider the weight of all the containers (particularly when they are wet). Just to test, I weighed one of the square 6.5 gallon planters that had just been watered, and it weighed in at 31 pounds. The large flexible 11.4 gallon bins weighed around 50 pounds each. As I mentioned before, a lightweight mix is key in this type of situation. I used Sta Green moisture control and also regular Sta Green mix.

One lucky thing for us is that our porch is built on top of a brick sunroom, so the entire perimeter sits on top of a permanent brick wall. You can see the same construction in the neighbor’s house in one of the pictures below. We placed all of the planters right along the porch fence, which is right over the center of the wall. This allows for the maximum amount of support. In addition, our porch is quite large (24 feet long by 8 feet wide), so the weight is spread over a fairly large area, rather than concentrated in one place.

Planter arrangement

Planter arrangement (other side of porch)
 If you are in a similar situation (upstairs porch) be sure to take the weight of your planters into account. Since these porches are built to withstand the weight of a foot or two of snow covering the entire flat surface (which is much heavier than the planters) we knew they wouldn’t be an issue. Also, it’s usually best to place anything heavy near the walls, as the structure will be strongest there (as opposed to the middle of the deck). In any event, if you are using an upstairs balcony/porch, make sure to take the structure of your space into account when placing your planters!

Here are a few pictures of the garden so far. Look for more updates in the very near future, including the promised entry on hardening off the plants for their trip outdoors!

Mesclun Mix
Mesclun Mix
Red Norland Potatoes


Zinnias

Flower/herb table
Strawberries