Friday, November 5, 2021

We've moved to YouTube!

Check out our YouTube channel for future updates! We've expanded to orchard culture and in-ground gardens, but there is still plenty of container garden content to enjoy!


Captive Roots YouTube Channel: 

https://www.youtube.com/channel/UCCbaY1h25mpBIAJhHbHIbyQ


Saturday, July 23, 2016

A Midsummer 2016 Update

Wow, it’s been a while since my last update! We’ve had a somewhat unusual summer here in Western New York: very dry, windy, sunny and hot. Some of the plants, especially the peppers, citrus and eggplant, seem to love the heat and sun. Others, such as the kale and chard, can’t seem to resist bolting. Forget about cilantro. It goes from a seedling to a flower almost immediately this year! Overall though, the garden is doing pretty well. Here’s a run-down of what is happening out on the porch. 
Is this the year we get a lemon?

Tomato Varieties for 2016: Brandywine, Black Beauty, Cosmic Eclipse, Blue Berry, Green Zebra

The tomatoes are doing well, but we have had some blossom end rot due to the intense daytime heat. Not only has it been close to or over 90 degrees many days this summer, we are also on an upstairs porch in the city. The floor of our porch is a black tar-like sealant, which holds the heat very effectively. We cover it with a rug, but it still can get very hot. This means that the temperatures in our garden are typically 20-30 degrees warmer than the air temperature. On a sunny hot afternoon the temperatures can easily reach 115-120 degrees out there! The highest I’ve measured with a digital thermometer is about 125. 
Black Beauty tomatoes!
You might think that when it comes to tomatoes the hotter the weather the better, but I have found that prolonged intense heat can result in blossom end rot and poor setting of the tomato crop if the plants happen to be flowering when it’s that hot outside. The good part of the extra heat is that it extends our growing season well into October, so we have plenty of time to harvest a heavy crop of tomatoes and peppers!
Green Zebras make their triumphant return to the garden in 2016!
The fabric 15 gallon containers seem to be working well, and I definitely recommend them to anyone who might be on the fence about fabric vs. plastic. The tomato plants are noticeably taller this year than in previous years, and they also seem very sturdy and healthy. I will definitely be buying a few more fabric pots next year and gradually switching over to mostly fabric.

Blue Berry Tomato with flower 
Peppers Varieties for 2016: Jimmy Nardello (2015 plant), Corno del Torro Rosso, Corbaci, Black Hungarian, Jalapeno, Anaheim, Biggie Chili, Orange You Sweet, Melrose

After a slow start, the peppers have been coming on strong the past 3-4 weeks. The Padron peppers are probably the furthest along of this year’s plants, and have set many peppers already. The overwintered Jimmy Nardello is just awesome, and a good example of why overwintering a pepper plant and taking it into the next summer is worth your time and effort. We have been harvesting ripe peppers from this plant since just after Memorial Day!

Melrose peppers!
Most of the peppers are flowering and setting fruit now, so we should have some very nice harvests in August and into September. Unlike the tomatoes, the peppers seem to love the heat. As soon as it got blistering hot they started growing and flowering like crazy.


The 2015 Jimmy Nardello plant...back for its second act!
Eggplant Variety for 2016: Mitoyo Eggplant

This plant got off to a slow start, partially due to an aphid infestation that took several round of insecticidal soap to get rid of. After that, it grew quickly, and is now flowering, so hopefully we will soon have some fruit!
Mitoyo eggplant
New for 2016! Onions: Red and Candy

One of my experiments this year was growing onions. We had grown green onions last summer, but I also wanted to try bulbing onions. They grew very well in window boxes, but what did them in prematurely was the strong winds we have had seemingly every day this summer. Once they grew tall the wind kept bending them and breaking the stalks, which signals the plant to stop growing and focus on the bulb. As a result, we got somewhat smaller bulbs than we normally would have, but I’m happy with this as a first try. Next year I plan on giving them a windbreak so that they can grow to full size. Look for a full onion write up in the near future!

Red onion in a window box... the twine was an attempt to tie them up to a stake due to the wind
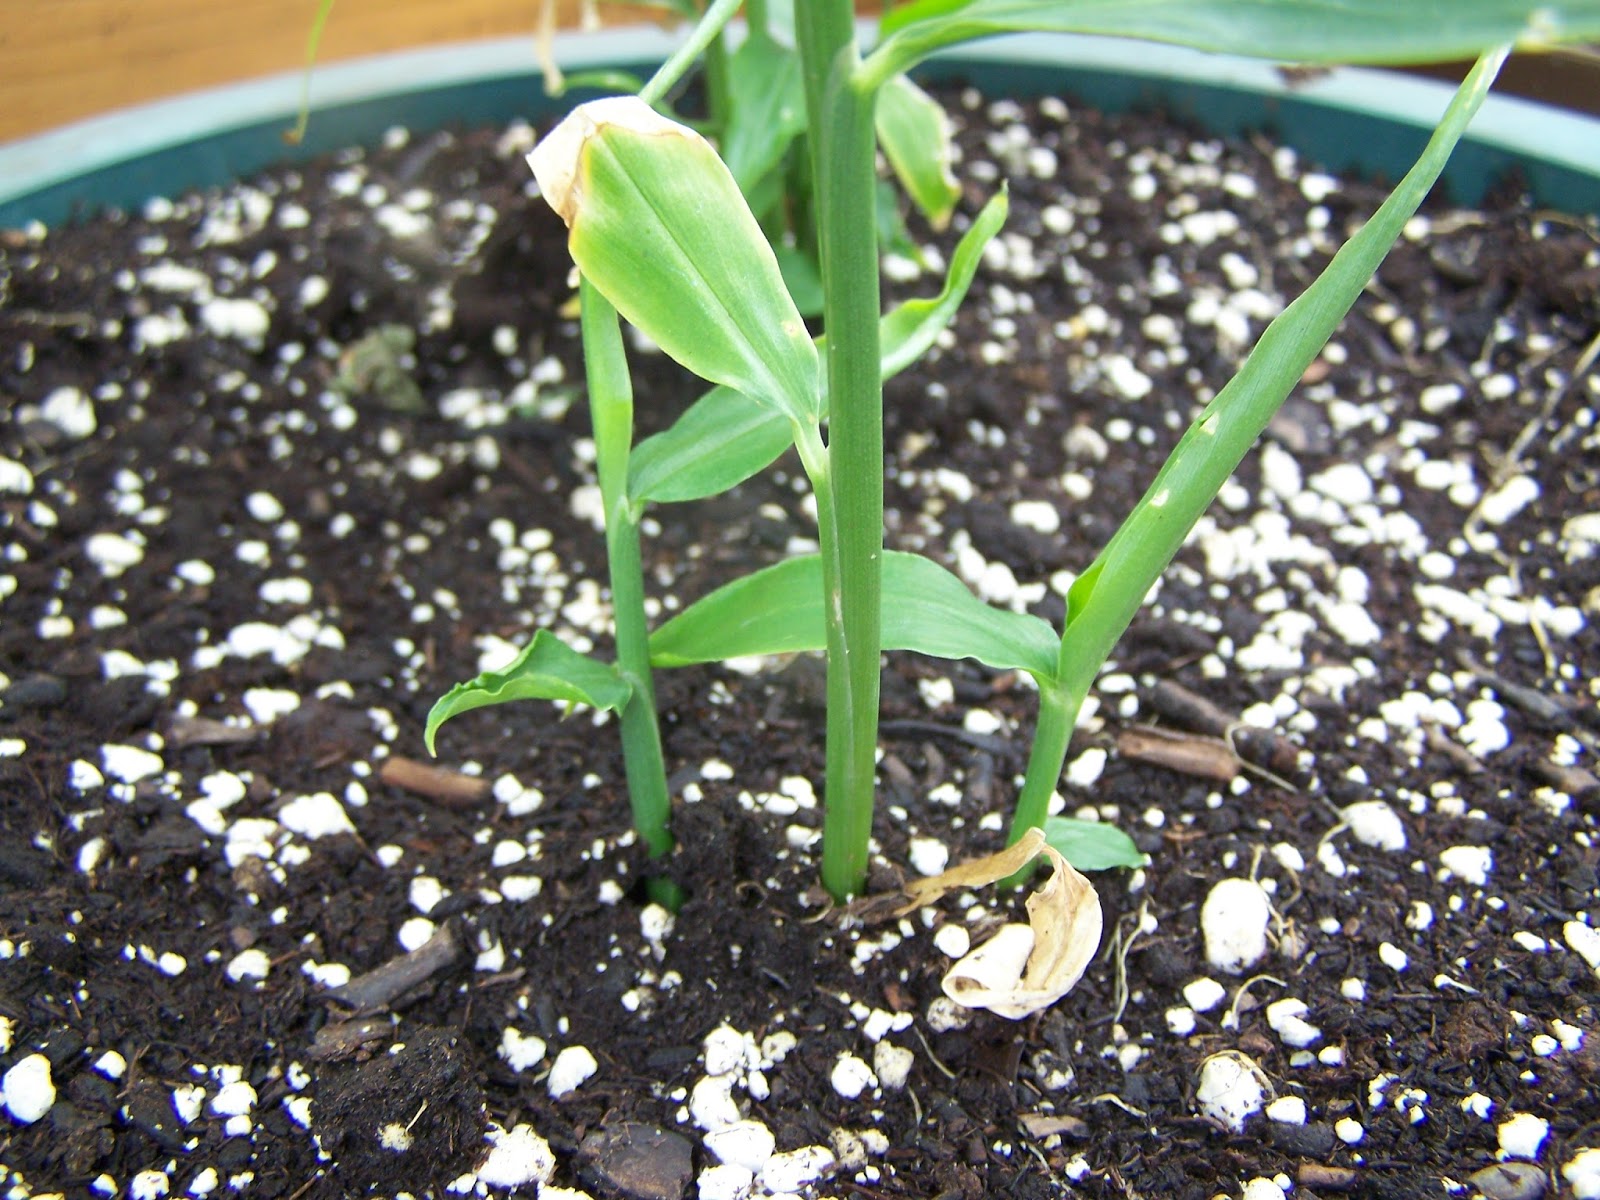
New for 2016! Ginger

I also wanted to try ginger this summer. We use it a lot, so it stood to reason that we should grow it as well, especially since it grows well in containers. I ended up ordering two ginger plants, which I received in late June. When you get a ginger plant it doesn’t look anything like what you buy in the store. It’s just a green plant with normal roots.

The middle stem was the original plant... Notice the lateral growth pattern
The part of the plant we eat is actually not the root of the plant at all but a rhizome. Think of a rhizome like a buried stem or stalk that grows horizontally under the soil, rather than vertically out of the soil. As the plant grows laterally it shoots up stems and leaves to collect sunlight. Then it spreads a bit more and the cycle continues. The part that we eat is actually the underground horizontal stem (rhizome), although I have read that you can also eat the leaves and the plant itself. I tried a little piece of the ginger leaf, and it does  taste like ginger, but it also has the texture of eating a large blade of grass, so I would stick to just eating the rhizome!

Herbs

Parsley!
One of the best parts of having a garden is having an assortment of fresh herbs available for cooking. Every year I grow a ton of basil, oregano, and sage because we dry and preserve it for use all winter. We also have parsley, thyme, rosemary, dill, fennel, chives, and green onions in the garden. The thyme is over a year old now, and the rosemary is around 4 years old. Just bring them in once October comes and keep them as tasty and fragrant houseplants until the next spring!

This 4 year old rosemary is almost a shrub at this point!
 Cucumbers: Lemon, White, Straight 8, and Kiwano (Horned) Melon

As you can see, the cucumbers are growing very well in their 15 gallon fabric pot. The main issue is all the strong wind we’ve had, which kept tearing the vines down from their trellis. I eventually decided to just let them grow across the floor, and the plants have been happier for it. So far we’ve harvested two white cucumbers, and one jumbo-sized Straight 8, which was close to 10 inches long. I wouldn’t recommend letting them grow to that size though, because they can become a bit tough. As their name suggests, 7-8 inches is the perfect size for a Straight 8. Since all the cucumbers are mixed together in the pot, I’m not sure where the lemon cukes are, but we should see some lemon cucumbers soon.
 
The cucumbers are taking over! 
The Kiwano melon plant is very healthy, but still doesn’t seem to be flowering, so I’m not sure if it just needs to develop a bit more or if there is some nutrient deficiency. I’ll be sure to post a bit more about this as the summer goes on.

Kiwano plant... no flowers yet! 
Flowers: Many types of petunias, marigolds, and button zinnias

Button zinnia
Flowers not only add beauty to a garden, but they also attract bees, butterflies, and apparently goldfinches, which love the zinnia flowers. One reason I try to avoid any strong pesticides is that I want all the bees in the garden we can get. More bees=more fruit! As long as you are not allergic to bee stings you have nothing to fear if a bee buzzes around you while you are in the garden. I routinely have several around me while I’m working, and I have never been stung by a honey bee or bumblebee. Wasps are a different story, but they are typically not in the garden around the plants or flowers.


I recently found a great website for petunia seeds called Swallow Tail Garden Seeds.

Marigold
The seeds are all pelleted, which means they have a coating on them that dissolves in water. The purpose of the coating is to make the seeds large enough to handle, as petunia seeds are tiny. The great thing about this site is that they have hundreds of types of petunias, so you’re sure to find unique varieties that you can’t get in your local garden center. Plus petunias are incredibly easy to grow. Just don’t bury the seeds, as they need light to germinate. Sprinkle them on top of the dirt and water with a mister. As soon as you water them the coating will dissolve and the seeds will sprout.


Espresso Frappe petunia

Eggplant flower

Button zinnia

Button zinnia

Daddy Mix petunia

Blue Star petunia
Citrus: Meyer Lemon and Persian Lime

This is the third year I’ve had the Meyer lemon tree, and it looks like this year we might get our first lemon harvest! Every year it has set dozens of small lemons, but they usually turn yellow and fall off when they are the size of a pencil eraser. Then the plant will flower and set more, but the same cycle repeats. However, this season I think the tree might be mature enough to produce, as evidenced by these large lemons that have made it through the summer so far.

Meyer lemon tree
The Persian lime is a plant I purchased last fall, so it’s a bit less mature than the lemon. I gave it a good pruning for shape early this summer, and it has responded with strong and healthy growth, so I’m hoping this winter it will flower for the first time. Right now the goal is to get a solid canopy and a strong root system.

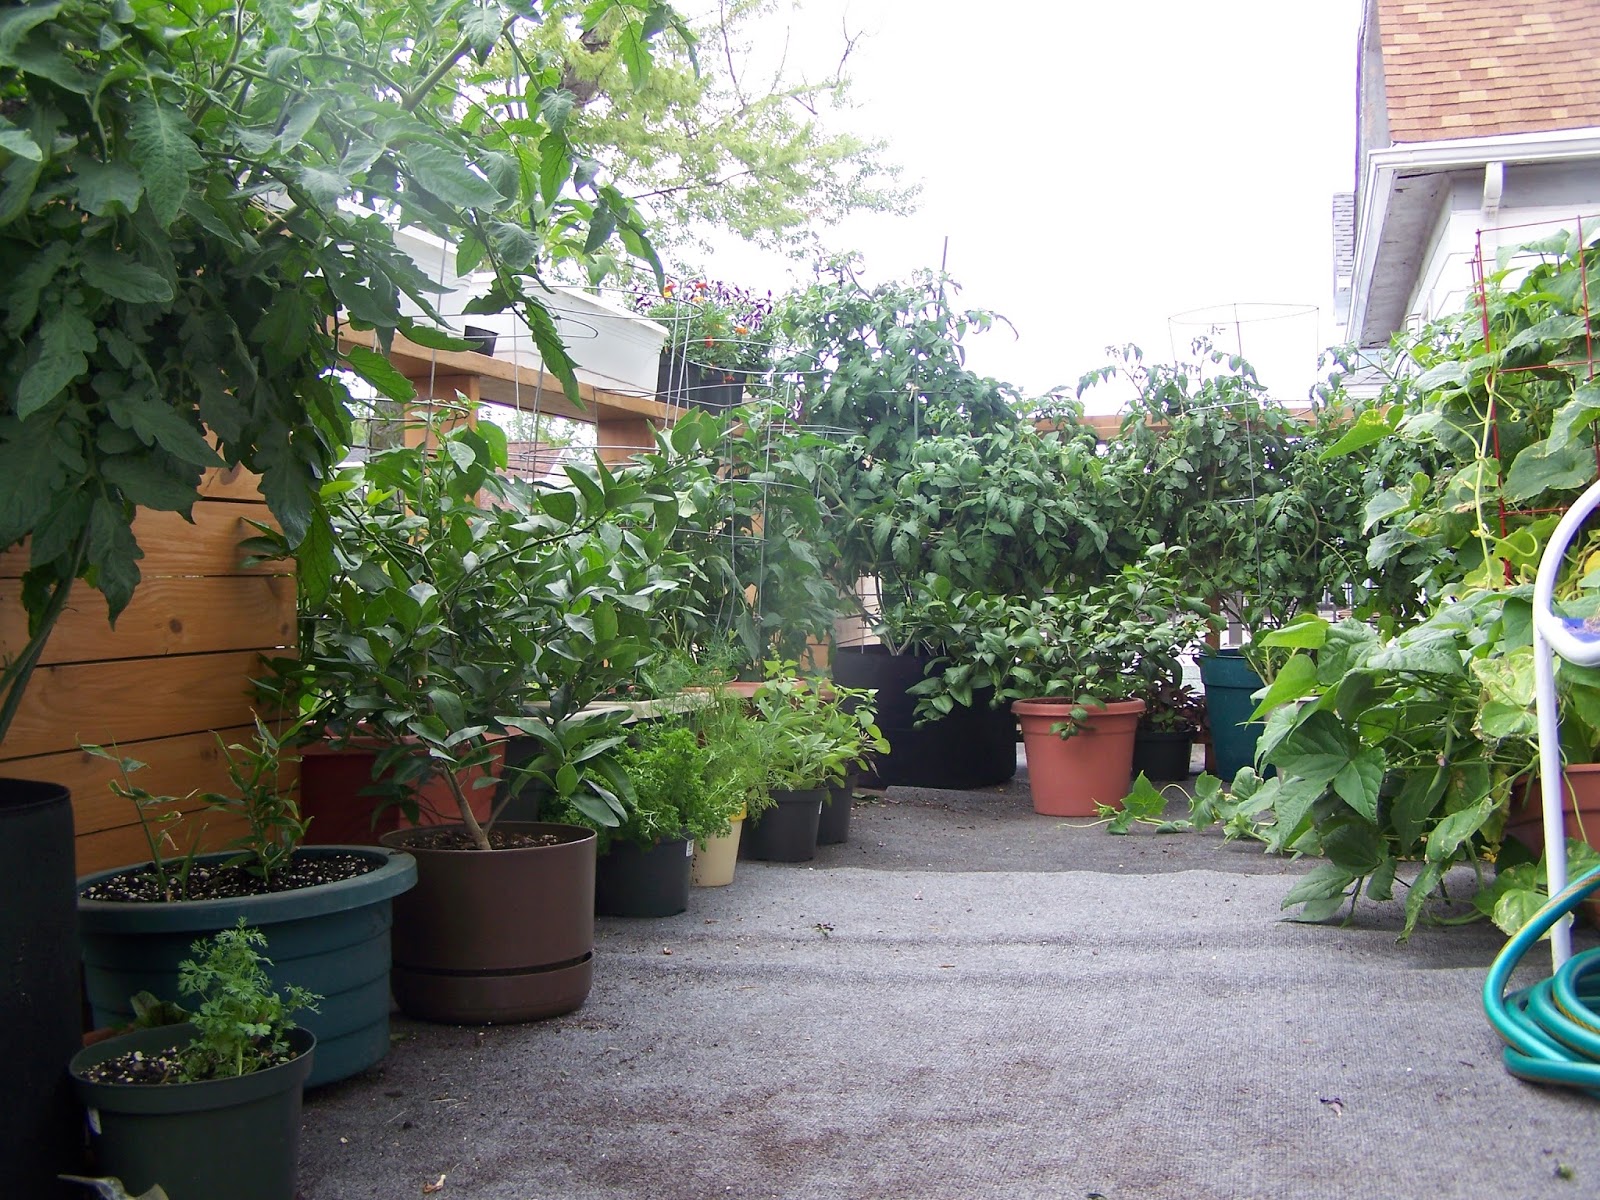
View of one end of the garden

View from the floor of other end of the garden
Look for a more detailed citrus post in the near future as well for more on growing citrus in containers!

So far the summer is going well in the garden. We’ve harvested around 50 onions, although many of the candy onions were small. We have a lot of tomatoes and peppers on the plants, so over the next few weeks we should start seeing some ripening, especially with this heat.

Look for a few updates in the near future focusing on the onions and the citrus. Until next time, happy gardening!


Friday, May 13, 2016

When to Plant?

When to plant? That’s the perennial question for any gardener, and if you’re anything like me you want to get everything out as quickly as possible. One advantage of container gardening is that you can put your plants outside pretty much whenever you want, as long as you’re prepared to bring them into some type of sheltered area when the nights inevitably get too cold. A garage, shed or barn works well, as does a living room or office, as we’ve had to do on many occasions. 
Let us out! 
This time of year is a paradox. We’re in Buffalo, NY, so we’re used to wild weather swings, but this spring seems to be fairly consistently cool and windy—neither of which are particularly conducive to growing most of the things we grow in the garden. The one positive is that it hasn’t gotten cold enough to frost here in weeks, so this year’s fruit tree crop should be much better than last season when we got the dreaded late frost. This also means that I’ve been able to have the citrus trees, onions, fennel, and some hardy herbs like chives, sage, thyme, rosemary, and cilantro outside for quite a while now.

However, it just hasn’t been consistently warm enough for the tomatoes, peppers, and eggplants to go outside yet. Yesterday it was 80 here. Today it’s about 58, and very windy. This weekend’s highs are forecast to be 55 on Saturday and 46 on Sunday. As much as I might be tempted to put the tomatoes out and just bring them in when (not if) it gets too chilly in the evening, that quickly becomes more of a hassle than it is worth. It’s not so much the bringing them in at night, but the need to put them back out in the morning when you’re getting ready for work that you need to consider. It takes more time and effort than you think it would if you have any number of plants. If your cats see a cracked open door as an invitation to bolt outside like ours do then the process becomes a bit more “interesting” as well! If you have just one or two plants I suppose it might not be an issue, but for us it’s just not worth the couple of extra days outside for the plants.

A plant slumber party sounds more fun than it actually is! This was from the 2015 garden. 
With all that said, next week looks like a great opportunity for planting: highs in the low to mid 60’s (which is fine) and more importantly lows in the low to mid 50’s at night. It is also going to be mostly cloudy for a few days next week, which is my favorite time to plant because it allows the seedlings to become accustomed to the brighter light before they get hit with direct sun. Around here if you can get your garden out around mid-May you’re doing very well. Many people just wait until Memorial Day to avoid any chance of frost, but in the city it is almost always a few degrees warmer than in the more rural areas of the region, so we can get away with pushing it a bit.

The Mitoyo eggplants are the perfect size to plant!
As far as hardening the seedlings off first, I typically put them out for a few days before planting, especially if it’s going to be cloudy. One difficulty this year is all the wind, especially for the tomatoes, which are almost 2 feet tall! The wind just rips them to shreds if I put them out in their seeding containers. Once they are planted very deep this isn’t a concern, but I don’t want to expose them to too much wind stress just yet. As I mentioned before, planting during a cloudy period of a few days works very well, and I’ve never had a major issue with plants getting sunburned when doing that. Keep in mind though that I grow them a few inches from a repurposed aquarium plant grow lamp that is many times brighter than a typical grow bulb. If you use a sunny window you might want to be more careful of shocking them with the change in brightness.

Basil seedlings!
In other garden news, I just received my order of five 15 gallon fabric pots, which will replace the 12 gallon black plastic tubs I was using for the tomatoes. 12 gallons was fine for the tomatoes, so 15 will be even better, especially for the Brandywines. Since the weather is going to be cool and rainy, I’ll write up a longer post about these fabric pots in the next few days.

Finally, if you’re interested in more frequent updates from the container garden, be sure to like 
like captive roots on Facebook, as I frequently post a photo of the day from the garden.


Until next time, happy gardening! 

Sunday, May 1, 2016

Planting Onions in Containers

This year I decided to experiment with a few new crops, and one of them is the humble, versatile, and delicious onion! After much research here is what I decided on for this season. Will it work? We'll find out together!


Step #1: Select an onion type that is appropriate to your region

This is key, because onions form bulbs based on the number of hours of daylight they receive. Your latitude determines the best type of onions for your region. There are many great resources for further reading on this topic, but it basically boils down to this:

Short Day Onions are best in the south. If you plant a short day onion in the north it will receive the required number of hours of daylight to trigger bulb formation early in the season before it has formed a strong root system and enough greens to support the bulb. As a result, it will grow greens but you will only get a tiny bulb. The unused package of Granex (Vidalia) seeds I have in my seed basket is a great example of this type (do your research before you buy!).

Long Day Onions are best in the north. These require very long days to form a bulb, so they will set their roots and grow their greens in the north in the cool of spring, then begin to set nice bulbs during the summer when daylight hours are much longer. If you plant a long day onion in the south it will never get the required number of hours of daylight to bulb, so all you will get is greens.

Intermediate Day (Day Neutral) Onions can be grown in both regions. They should work well in most growing regions, aside from the extremes.

After I read up on daylight hours I selected two day neutral types: Candy onions and a red onion.

Red onions planted in early April
Step #2: Seeds, sets, or plants?

This is another consideration. You can grow your onions from seeds, sets (small onion bulbs), or small plants. Seeds are cheap, but take a long time. Sets (the small bulbs) already have a nice head start, but after watching hours of Youtube videos and reading far too many articles, the consensus seemed to be that planting bulbs would result in plants that would bolt quickly, which leads to smaller bulbs and detracts from storage and overall quality of the harvest.

Your onion plants will probably look like this. These are Candy onions
I decided to go with small onion plants, which are just seedlings that have grown to 5-6 inches and are ready to plant. These come in bunches of 30-50, depending on the source. Although they might look dried out or delicate, it is very easy to separate the roots and end up with individual onion plants. If you start them early enough (mid December or so) you can of course just grow these from seed yourself, but I didn't plan ahead so it's plants for me this year!

To separate, gently pull the bunch apart. Then, simply pull out each onion plant, being careful not to damage the roots too much. As I mentioned before, they are a lot tougher than they look, but they will break if you rush it. If you break a few it's no big deal. This was a bunch of 50, so you'll get plenty.


The individual plants ready for the soil!
Step #3: Select and prepare your planter

So now you have your plants ready for soil! Hopefully you already have a number of containers on hand, as well as soil. The question then becomes which container type is best suited to growing onions.

In my case, there are a few considerations. First, space is limited. We have an upstairs porch, so we need to get as much yield from the available space as possible. This means pushing any spacing suggestions right to the limit. In addition, since this is an experiment I don't want to dedicate one of my "premium" containers to onions when there are peppers, tomatoes, eggplants, cucumbers, and many more crops that need a lot of space.

Onions don't grow very deep, but they do need horizontal space to accomodate the bulbs. I decided to use my window boxes, as they are about 36 inches long and hold about 7 gallons of soil, so they are a good size and also allow for a horizontal spread. They can also fit on the porch rails, leaving floor space for the VIP's of the garden. Yes, tomatoes know they are hot shots and have the egos that go with that!

Of course, make sure you use a good potting mix. I have had good luck with any decent quality mix. I look for a light mix (we are upstairs on a porch so weight matters) and one without much, or any, fertilizer, as I like to add my own. Lately I've been using Baccto Pro Mix with good results. It is light, fluffy, and simple. Just make sure to add fertilizer!

Planters filled with mix and ready to go!
Step #4: Space out your plants

In the instructions that came with my candy onions, it was suggested that the onions be spaced 4 inches apart, and 2 inches from the side of the bed (or container in this case). This was the spacing I used for the red onions that I planted a few weeks ago in early April.

Space the plants 4 inches apart 

Also, give them 2 inches from the edge of the bed or container 
More space is always fine, but crowding can result in smaller plants. By following this spacing (with some extra as it turned out) I was able to fit 10 onion plants in each of my 3 foot window boxes. I decided to really push the spacing to the limit and give each plant exactly 4 inches in one of the candy onion boxes, which gave me 16 onions in that container.

All told, I ended up with 2 three foot planters of candy onions, for a total of 26 plants. Earlier in the month I also planted one 3 foot planter of red onions (10 plants) and one 18 inch planter of 5 red onions, for a total of 15. All together, I have 41 onions plants, so this should be an interesting experiment.

Roughly space out the plants
Step #5: Plant the onions (but just the roots!) 

Now it's time for the fun part: planting! The key is to plant shallow. Unlike tomatoes, peppers, and many other garden favorites, onions should be planted very shallow. The instructions that came with these onions direct you to just bury the roots, but leave the white of the onion above ground as much as possible. The reason is that they will apparently form larger bulbs if the bulbs are mostly on top of, rather than buried by, the soil. It makes sense if you've ever seen onions growing, as it looks like they are just sitting on top of the ground.

Make a 1 inch deep hole and just tuck the roots under the soil

Keep most of the white of the onion above the soil

It is going to feel like the plants are very wobbly at first. I was worried about this, as we get a lot of wind on the porch, but you will likely be surprised at how quickly these plants anchor themselves into the soil. Within a few days the red onions I planted, which were much smaller and less green than these candy onions were, were firmly rooted and didn't budge when touched. 
Candy onions just after planting
Once they are planted, water them in as normal, fertilize with a good all-purpose fertilizer, and you should be on the way to successfully growing onions! At least I hope so! We'll see as the season progresses...

In summary: choose the right onion for your latitude, space at least 4 inches, plant shallow, and fertilize!

From everything I've read, onions are an extremely hardy crop. They are tough to kill, withstand frosts, and grow pretty much anywhere. This spring our chives, which were in a small container that was still frozen solid, were growing up through the frozen soil and were a good 6 inches tall before the dirt inside the container finally warmed up and defrosted.

One last great thing about onions: they can (and really should) be planted early, so you can get out in the garden and get some things growing before spring truly arrives. Be sure to check back often for updates on the onions, as well as everything else in the container garden. Also, if you follow Captive Roots on Facebook I will be posting a photo from the garden each day, starting today!

Until next time, happy gardening!


Saturday, April 23, 2016

Welcome to the 2016 re-launch of Captive Roots!

Hello everyone!
Meyer lemon blossom
It's been a while since I've posted, so I wanted to let everyone know that the blog will be up and running again on a regular basis very soon! There hasn't been a lot of material to cover the past several months other than starting seeds and battling bugs on the citrus and pepper plants (more about that in my upcoming post) but now that temperatures are warming up and we have some nice sunny days I'm excited to get back out on the porch!

An early Nardello pepper!
I've been working on a lot of exciting projects that I look forward to sharing with you, such as overwintering a Jimmy Nardello pepper plant, which aside from the aforementioned battles with bugs was a pretty good success. It isn't the prettiest pepper plant right now, but it's healthy, alive, and already starting to flower, so once it puts out its canopy it will be quite the plant.

Overwintered Jimmy Nardello
We also have some citrus flowers on the Meyer lemon tree. The minute I put this outside a week or so ago it was covered in bees, so I'm hoping we get some good lemons this season!

"Release Us!" - Brandywine Tomatoes (2016) 
So while today's post is short, I have many more to come in the near future. It's almost garden season!

Soon...


Friday, July 10, 2015

A Weekend Photo Tour!

Eggplant! Beware the spikes!

It's been a while since my last post, and the garden is going strong. We've had a very wet start to the summer, which has been a challenge at times with the tomatoes. But now that we're having more summer-like temperatures everything is happy and green!

Here is a photo tour of the garden from this afternoon. This week I'll be doing some posts focusing specifically on certain crops, so stay tuned!

Garden facing north


Garden facing south


Melons

I'm looking forward to these melons. As you can see they are easily trained right up the tomato cage. I'll be doing a post on these this week! 

Blue Beauty tomatoes

Easily my favorite tomato, and these plants are already loaded with some nice fruit! 

Orange You Sweet peppers

A delicious orange pepper that is great for stuffing. 

Poblano peppers

Our favorite pepper in the garden. A hint of heat, and tons of flavor. Also among the most prolific pepper varieties I've grown. 

Orange and red chard mix

Chard is one of our favorite greens to eat, so we have several containers planted this year. 

Perpetual Spinach

This is a type of chard, but looks and tastes more like spinach. It also does not bolt in the heat! 

Beets

We just had our first beet harvest! I'll be doing a post about the beets next week as well. 

Daddy Mix petunias

Petunias are my favorite flower in the garden. The Daddy Mix is a variety of 3 veined petunias.